AZD Command Line Deploy#
The Azure Developer CLI (azd) is an open-source tool that accelerates the time it takes to get started on Azure. azd provides a set of developer-friendly commands that map to key stages in a workflow (code, build, deploy, monitor).
If a project is configured to use azd, then these commands and notes apply. To learn how to make a project compatible with azd, see Making Your Project 'azd' Compatible.
Commands#
The three commands of most interest are:
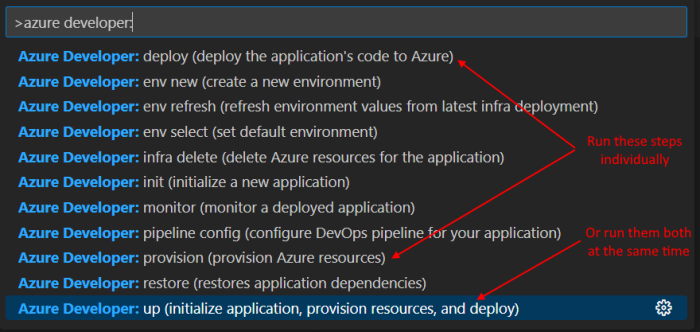
- azd up: provisions Azure resources, builds app, and deploys it to Azure
- azd provision: provisions Azure resources
- azd deploy: builds app and deploys it to existing Azure resources
Typically a developer with either do the up command to do everything at once, or do the provision and deploy commands separately.
Environment Names#
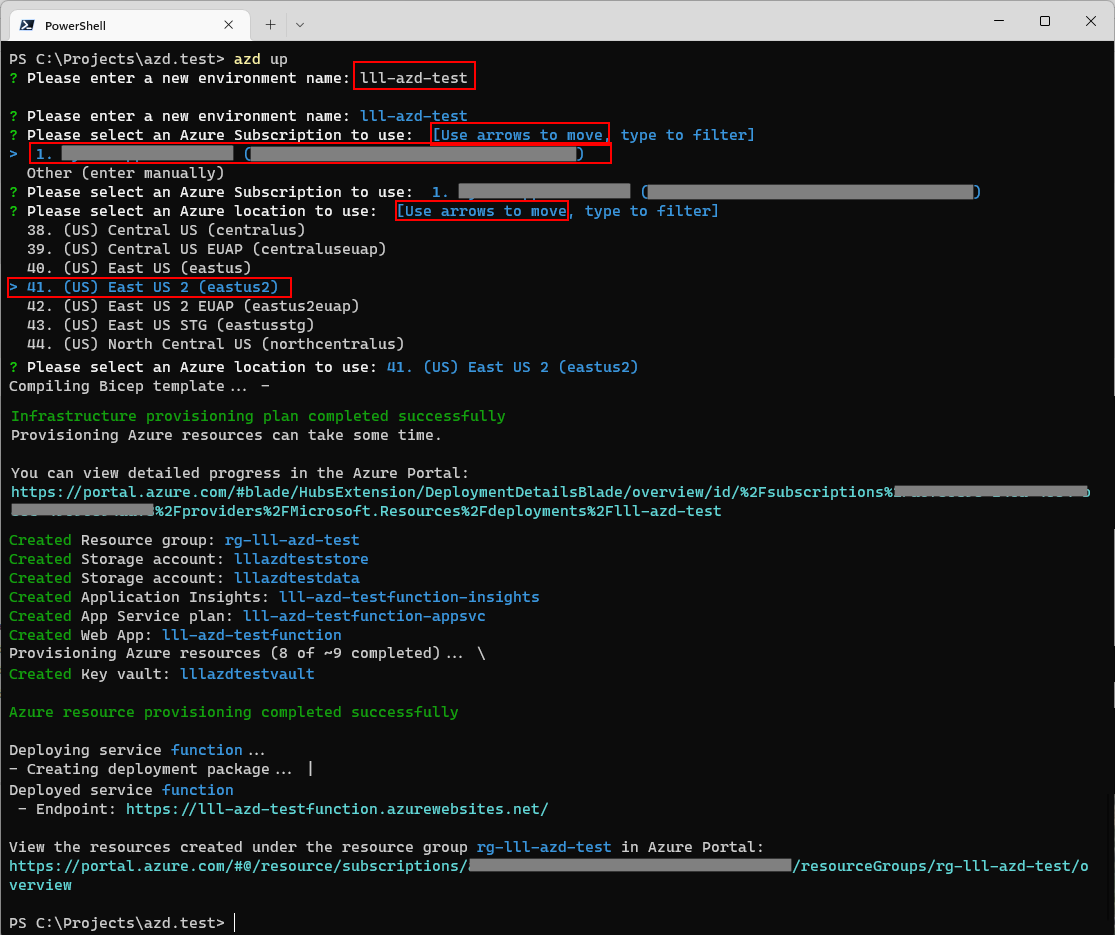
When this command is run for the first time, a prompt will ask for the the "Environment Name", the Azure Subscription to use and the Azure Region to deploy to. NOTE: this is not an environment code like ["dev"/"qa"/"prod"]!
Choose the "Environment Name" carefully, as it will be used as the basis to name all of the resources, so it must be unique. Use a naming convention like [yourInitials]-[appName] as the format for Environment Name.
For example, if Environment Name is equal to:
xxx-function-demo
AZD will create a Azure resources with these names:
| Azure Resource | Name | Uniqueness |
|---|---|---|
| Resource Group | rg-xxx-function-demo | in a subscription |
| Azure Function | xxx-function-demofunction | global |
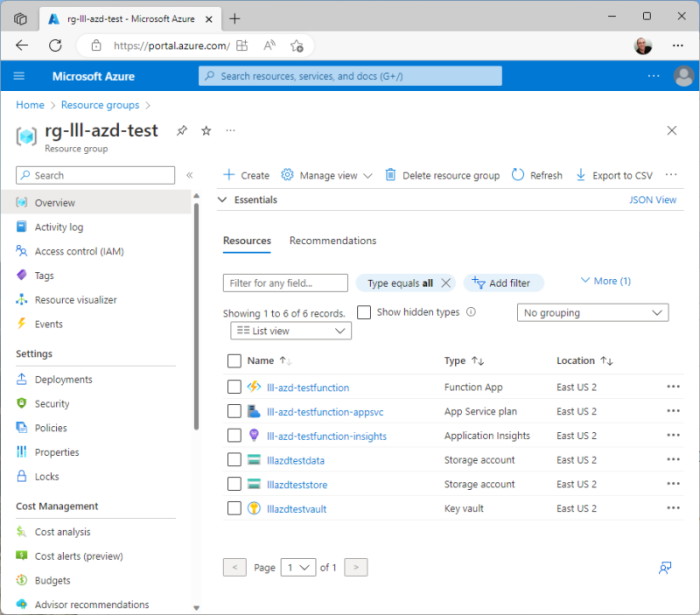
Storage accounts and other resources will be named in a similarly fashion.
Visual Studio Code#
There is a Azure Developer CLI extension available in Visual Studio Code. If that is installed, it is easy to pop up the command window like this:

Command Line#
These commands can also be run on the command line, like this:
> azd up
Example Command Execution#

Resources Created#
